New Spring Watercolor - Coming Soon on Note Cards, Journals, More!
Share
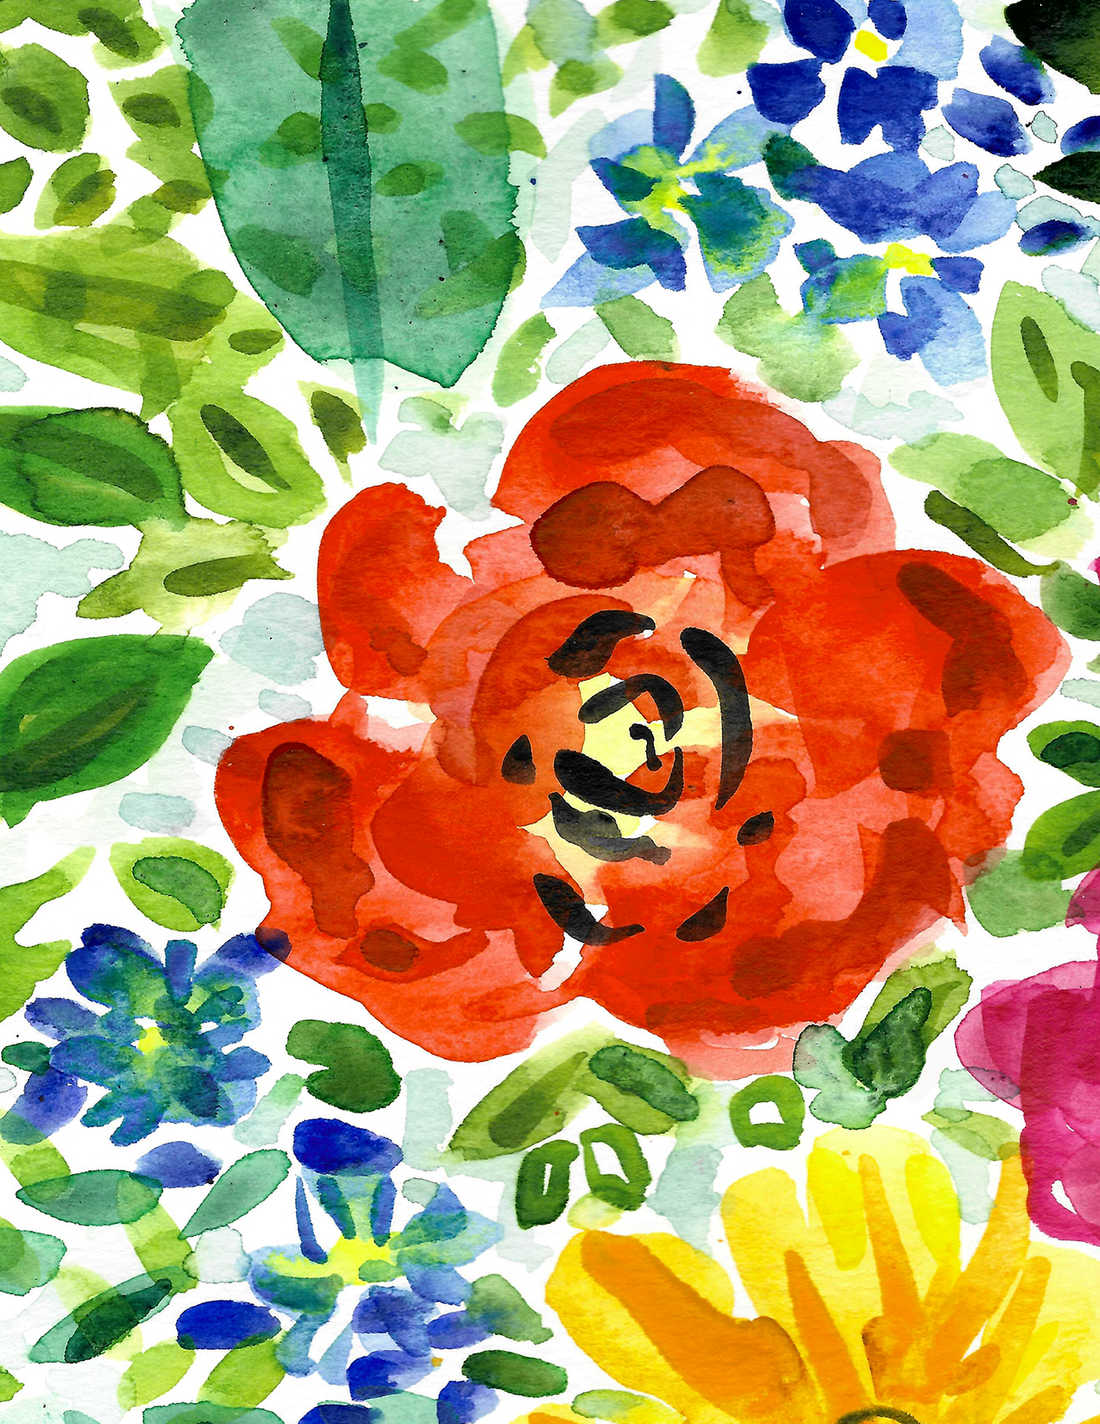
After another blast of ice cold weather and snow, I am dreaming of spring, sunny days, and flowers. This weekend I hunkered down in my studio and began working on a few new things for spring, including this garden-inspired floral watercolor.
There’s something magical about painting with watercolors—the way the colors bleed into one another, the unpredictability of each brushstroke, the feeling of letting go and just allowing the paint to flow. It’s freeing, almost meditative.
This floral painting was one of those spontaneous, joy-filled moments where I let my creativity take over, and I want to share the process with you—not just the technical steps, but also the inspirations and little lessons I picked up along the way.
The Spark of Inspiration
I’ve always been drawn to nature, especially flowers. There’s a certain vibrancy and energy in a blooming garden that I wanted to capture on paper. I didn’t have a rigid plan—just a vision of bold, lively colors that would blend effortlessly into a sea of greens, blues, and rich red hues.
Rather than focusing on precision, I wanted this painting to feel organic and expressive, like a memory of a garden rather than a photo-realistic representation.
Gathering My Tools & Setting the Mood
Before I even put brush to paper, I set up my little creative space. A cup of tea, my favorite playlist humming in the background, and a fresh sheet of watercolor paper waiting for that first splash of color.
Here’s what I used:
- Watercolor Paper (Cold Press, 140lb) – The texture makes every wash look rich and alive.
- Watercolor Paints – I chose warm reds, deep blues, and earthy greens to create a contrast between flowers and foliage.
- Brushes – This was a two-brush painting using two sizes of round brushes for the delicate petals and leaves.
- A Spray Bottle & Paper Towels – My little secret weapons for blending and lifting color when needed.
The Process: A Dance Between Control & Chaos
1. Sketching (But Not Too Much!)
I started with a faint pencil outline, just enough to guide me without boxing me in. I wanted this piece to feel loose and expressive, so I avoided over-sketching details.
2. The First Wash: Letting Go
I started with a wet brush, letting shades of green swirl together for the leaves and foliage, with quick strokes for the smaller leaves and more deliberate strokes for the larger ones.
3. The Heart of the Painting: The Red Bloom
This was the moment I had been waiting for—the big, bold red flower. I took my round brush, loaded it with a rich mix of red and orange, and let it dance across the paper.
The petals started as soft shapes, and as they dried, I added layers to create depth. I love how watercolor forces you to be patient, to let each layer dry before adding the next. It’s a lesson in both painting and life—good things take time.
4. Contrast & Drama
To make the red flower stand out, I added deep blues and yellows around it, painting smaller blossoms and leaves. I love playing with contrast, how a single dark stroke can make lighter colors pop.
The center of the flower needed something bold, so I grabbed my fine brush and added dramatic black strokes, letting them curve naturally to mimic the organic swirl of real petals.
5. The Finishing Touches
Once the painting was mostly dry, I stepped back. Something was missing.
I took a faint, watery shade of blue to some of the white areas to create pale petal shapes.
What I Learned (Again) from Watercolor
Every painting teaches me something new, but this one reminded me of some important truths:
- Watercolor has a mind of its own—embrace the unexpected. Some of the best effects happen when you stop trying to control everything.
- Layering creates magic. Even the brightest colors need shadows to shine.
- Not everything has to be perfect. In fact, the beauty is often in the imperfections—the messy brushstrokes, the uneven edges, the little surprises along the way.
Final Thoughts: A Hopeful Spring Painting
This painting started as a simple idea, but it became something more—a reflection of how I was feeling that day, a snapshot of joy and creativity. That’s what I love about art: it captures a moment in time, a piece of who we are at that exact instant.
If you’ve ever wanted to try watercolor but felt intimidated, my advice is simple—just start. Let go of the pressure to make something perfect and instead, let yourself play. That’s where the real magic happens.
I’d love to hear your thoughts! Have you ever painted with watercolors? What’s your favorite part of the process? Drop a comment below—I’d love to chat!
PS - If you're local to Central Ohio, come join me on March 6 as I'll be teaching this watercolor painting at Inspiring U in Westerville. (Adults only. Pre-registration required. Visit their web site for class information and registration.) 😊🎨